# AWS S3 browser will save you time
> Simple interface for data stored in S3
- URL: https://lokahq.github.io/tech-blog/aws-s3-browser-will-save-you-time/
- Type: Blog article
- Authors: Dragan Savevski (Frontend Engineer)
- Published: 2025-06-17
- Updated: 2026-09-30
- Reading time: 5 min
- Tags: AWS, S3, Amplify
- Originally published on Medium: https://medium.com/loka-engineering/aws-s3-browser-will-save-you-time-f24dd6b49dfc
---
The S3 browser makes it easy to add secure, scalable file management to your app in minutes. Easy-to-use APIs and pre-made UI elements let developers create secure and scalable file storage experiences without dealing with the complexities of cloud infrastructure, and with built-in authentication and flexible customisation options ranging from theming to advanced UI hooks, you can tailor the experience to your needs. For even more control, you can use Amplify’s storage APIs directly to build custom solutions.
In the following sections, we’ll walk through how to set it up, tailor it to your needs, and even create a custom interface from scratch if desired. By the end of this piece you’ll be up and running with your own storage browser.
### Setting up the S3 browser
The quickest way to set up the S3 browser is to use the [Amplify template](https://github.com/aws-samples/sample-amplify-storage-browser) which creates S3 buckets for you. This is the template we’ll use in this guide. (If you’d rather work with an existing bucket(s), another [template](https://github.com/aws-samples/sample-amplify-storage-browser/tree/sample/amplify-auth-with-existing-bucket) does exactly that). Deploying this template requires an AWS account with appropriate permissions. See this [setup guide](https://docs.amplify.aws/react/start/account-setup/) for more details.
Both of these templates leverage:
- **AWS S3** for encrypted file storage
- **AWS Cognito** for user authentication
- **AWS IAM** for granular access control
- **React + Vite** for a modern frontend architecture
### Deploying the template
We have our template that renders the S3 browser, let’s follow these short steps to deploy it.
[Video](https://lokahq.github.io/tech-blog/blog/aws-s3-browser-will-save-you-time/1-Db-blSIc6I8ZzCDGIaB4ZQ.mp4)
Deploying with AWS Amplify
After the deployment is done we are taken to a screen where we can see the URL for our application.
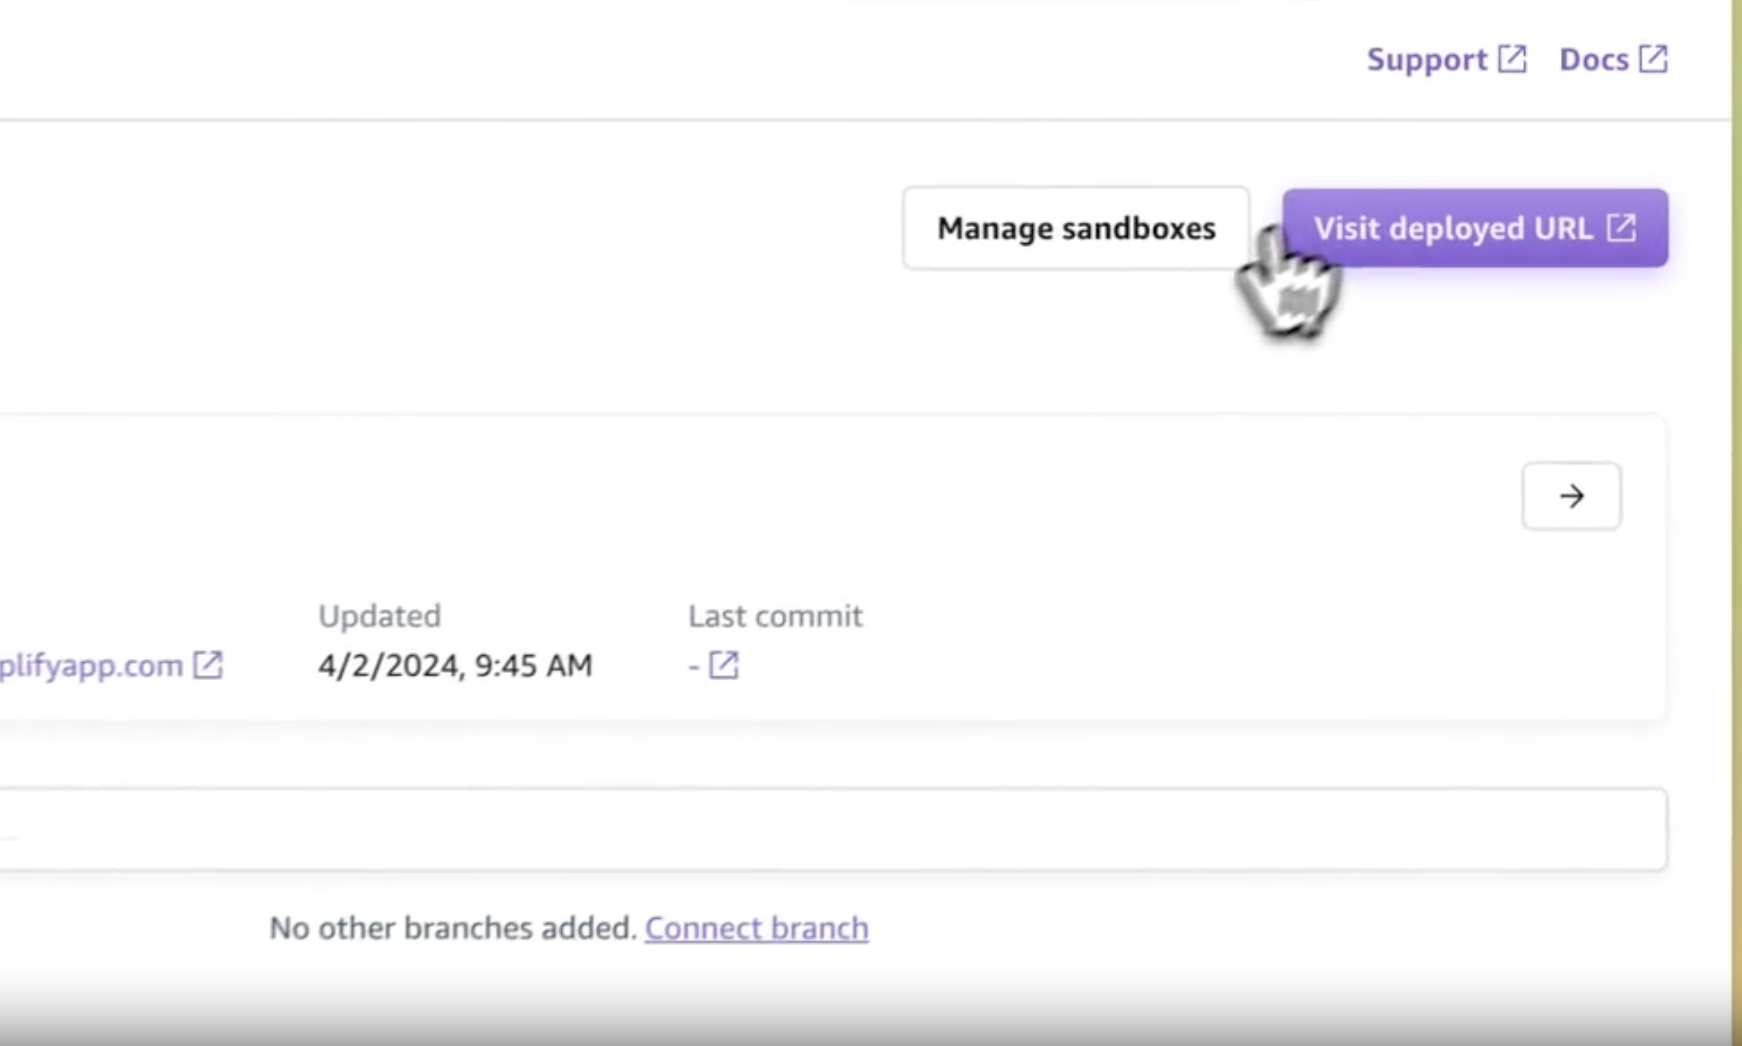
Application URL
After opening the application URL we are taken to a login screen. That’s because the template comes with authentication features out-of-the-box, making the storage browser secure by default. If you like, you can customise the sign-up/in requirements for your specific needs (for example, only allowing certain users or even disabling authentication altogether). Let’s create a user by signing up and then sign in to the application.
Upon signing in, you will see two buckets with three folders each, as configured in the sample template. Notice the familiar file-system-like interface that the S3 browser offers for you users.
[This configuration](https://github.com/aws-samples/sample-amplify-storage-browser/blob/main/amplify/storage/resource.ts) sets up the buckets’ folders and their permissions. For more on bucket authorisation rules, check the [official Amplify docs](https://docs.amplify.aws/react/build-a-backend/storage/authorization/).
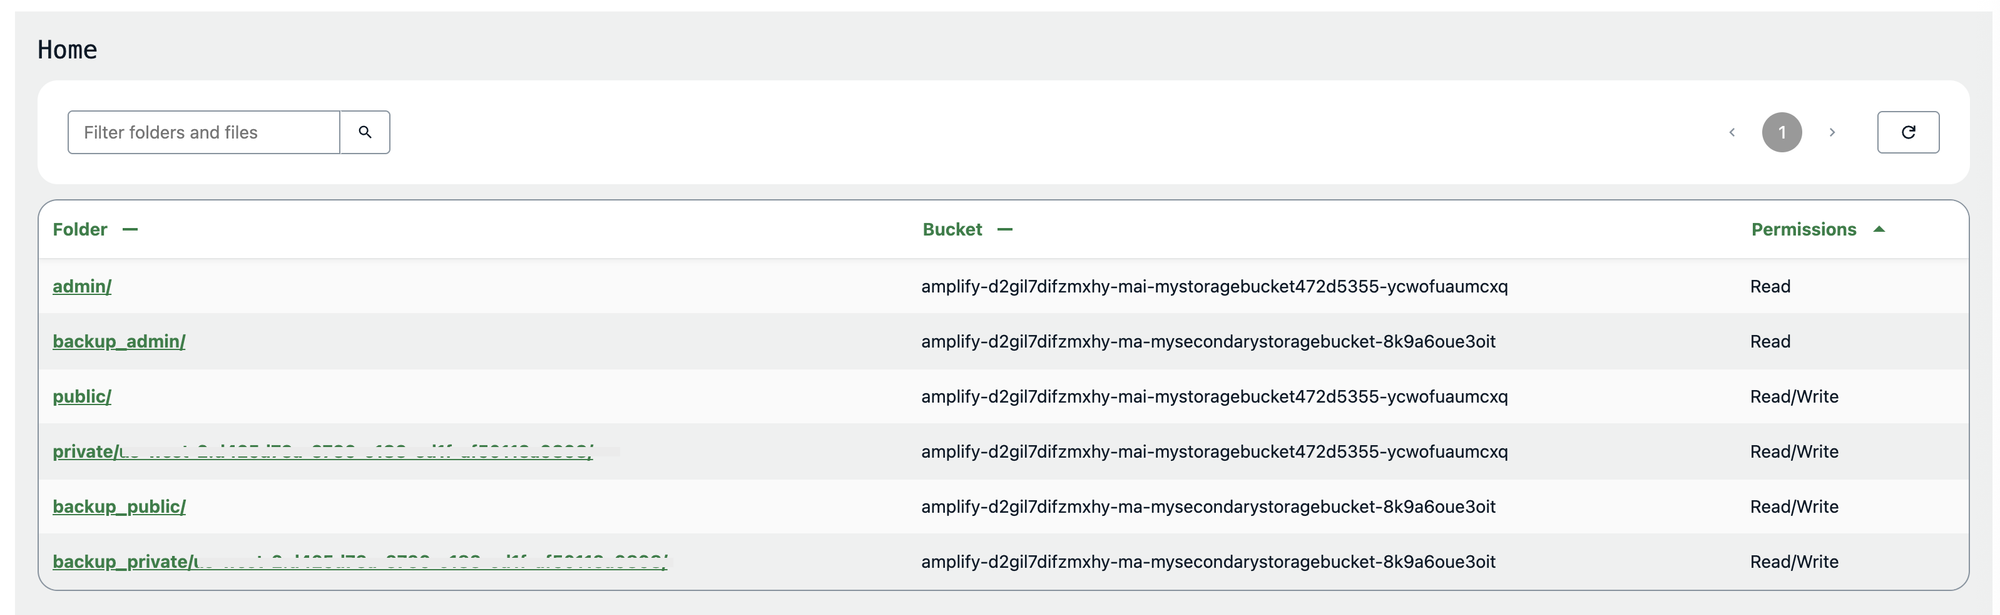
Storage browser component powered by the Amplify UI library
> **And that’s it!** With this setup you get enterprise-ready file browsing interface running in almost no time!
### How to customise the S3 browser
There are multiple ways to customise the storage browser for better branding and user experience purposes:
- The simplest one is to override the [Amplify UI theme](https://ui.docs.amplify.aws/react/theming#theme-object). In addition to overriding theme, plain CSS can be used to adapt the style of the components. All the design tokens defined in the Amplify theme are CSS variables that can be overridden.
- The storage browser is made of composable components which can be reordered and customised. This can be achieved with the help of the [exposed hooks](https://ui.docs.amplify.aws/react/connected-components/storage/storage-browser#view-reference) that have access to the storage browser’s internal state and event handlers. (e.g., Hide the upload button for users that have only read access)
- Custom-made storage browser from scratch if prebuilt components don’t fit your requirements. While the storage browser component is powerful, sometimes you need complete control over the UI/UX or require features not offered out of the box. In such cases, you can use the underlying [Amplify storage module directly](https://docs.amplify.aws/javascript/build-a-backend/storage/reference/).
### Plain CSS customisation
A plain CSS file containing rules that target the Amplify static classes is powerful enough to satisfy many styling requirements. As an example, we can change the title font and the table’s border radius. In the [template](https://github.com/aws-samples/sample-amplify-storage-browser) in `App.css` add the following CSS code:
```css
.amplify-storage-browser__data-table {
border-radius: 2rem;
}
.amplify-storage-browser__title {
font-weight: bold;
font-family: monospace;
}
```
Execute`npm run dev` and you are ready for local development. Through the Chrome dev tools discover the classes that you seek and adapt them to your liking.
> **_! Beware_** _that plain CSS styles are global and will target multiple instances of the component!_
### Taking advantage of the composable components
What if you didn’t need a full-blown table but only a simple listing of the S3 buckets. This can easily be achieved by using the hooks exposed from the storage browser component:
```typescript
function LocationsView() {
const state = useView('Locations');
return (
{state.pageItems.map((location) => {
return (
{location.prefix}
{location.permissions.join(', ')}
);
})}
);
}
```
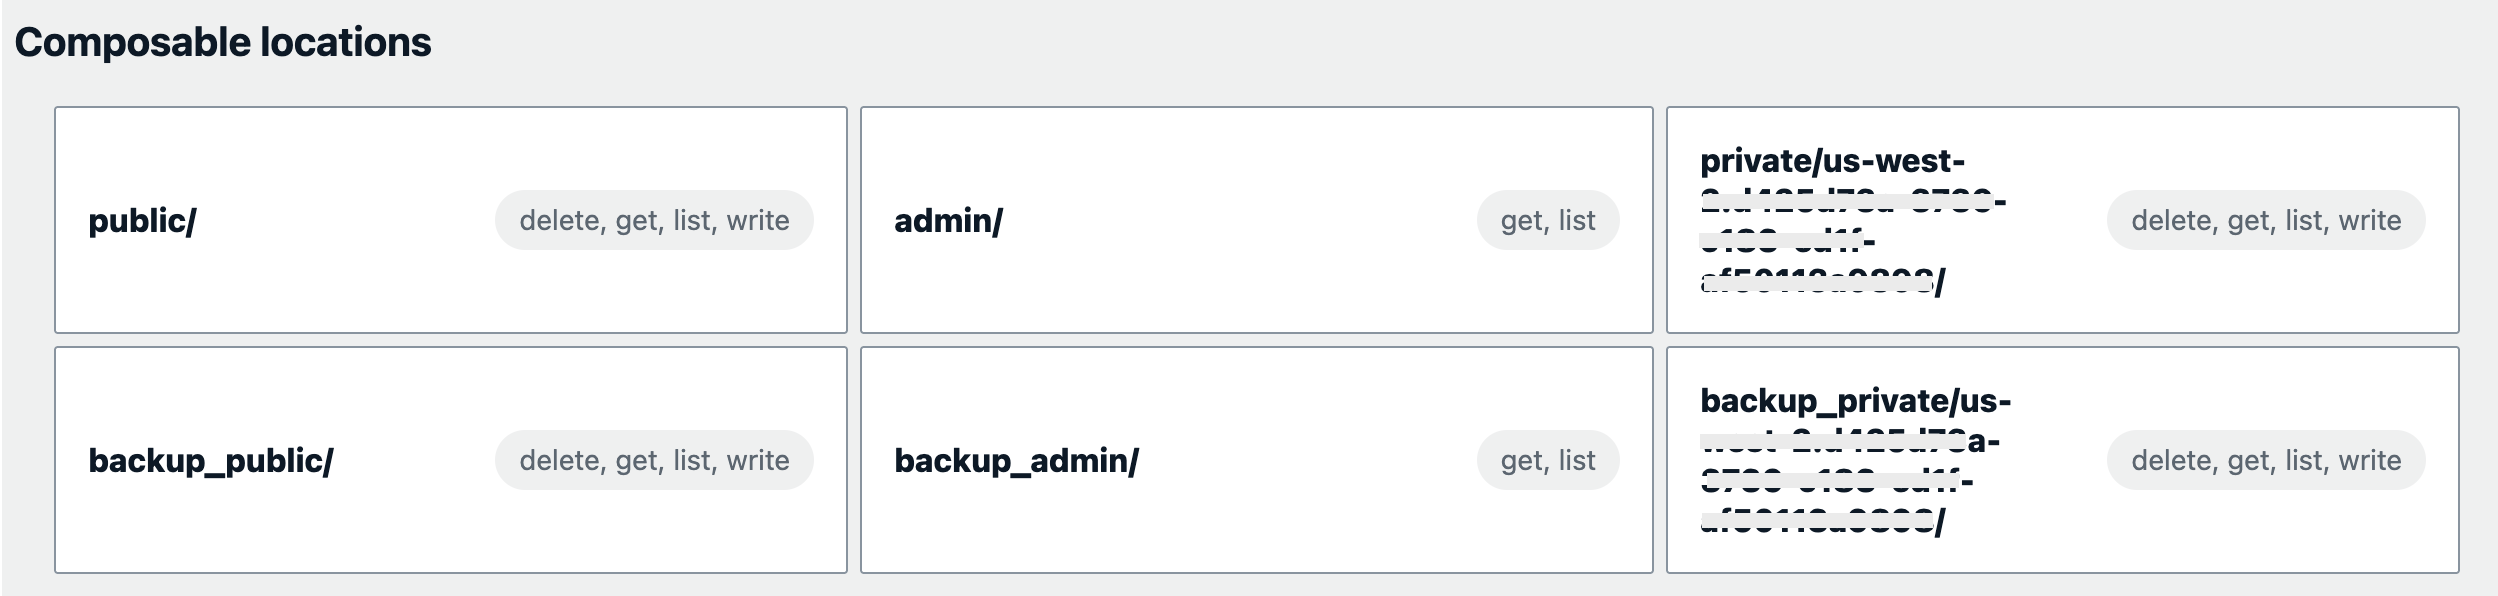
Customised view of the bucket list
By using `useView('Locations')` we can get access to the internal state of the storage browser. Besides the locations view, you can also [customise](https://ui.docs.amplify.aws/react/connected-components/storage/storage-browser#custom-ui) the location detail, upload, copy, create, and delete.
### Without the Amplify UI library
Maybe you already are using some kind of component library, and you just don’t want to add another dependency. In that case, building something from scratch is a valid approach. Let’s just say we want to build a simple medical file system that categorises some files. The Amplify storage module offers these [API endpoints](https://docs.amplify.aws/javascript/build-a-backend/storage/reference/). In this case, we need just the list endpoint.
```typescript
function LocationsViewCustom() {
const [locations, setLocations] = useState<{ path?: string }[]>([]);
const labResults = locations.filter((location) => location.path?.includes('lab-results'));
const clinicalNotes = locations.filter((location) => location.path?.includes('clinical-notes'));
useEffect(() => {
list({
path: 'public/',
options: {
bucket: 'myStorageBucket',
},
}).then((res) => {
setLocations(res.items as { path?: string }[]);
});
}, []);
return (
{
return (
{location.path}
);
}),
},
{
label: 'Clinical notes',
value: 'clinical-notes',
content: clinicalNotes.map((location) => {
return (
{location.path}
);
}),
},
]}
/>
);
}
```
Here we are listing the `public` folder of the bucket named `myStorageBucket`.
> **_! Make sure_** _you have the Amplify library installed! If you’ve started with the templated suggested at the beginning that would be the case, otherwise run_ _`npm install aws-amplify.`_

Simple medical file system
### The takeaway
Whether you use the prebuilt components or go fully custom, Amplify vastly simplifies cloud file storage browsing so you can focus on building great features for your users.